I. Map Section
Going to the map section in AW. Click on the map Icon.

What can be found? Maps, Scenarios and Presets. Where:
Most of the map-makers use maps and scenarios. Some maps are actually scenarios and only can be played as scenarios. For instance WW i & II, UN, etc. Where parties (teams) are defined and/or one player can have more countries assigned.
- Maps are, like the name says, basic maps that contain at least countries, cities and units. Usually also a background, that is the image against which players evolve the game.
- Scenarios are special settings to maps, that may include the definition of teams (group of players) and may assign a set of countries to one or more players.
- Presets: are special settings for the use of particular maps. Most of them are based on the standard "World Map" and are utilized to define countries that are active, starting budget, turn duration, etc.
Most of the map-makers use maps and scenarios. Some maps are actually scenarios and only can be played as scenarios. For instance WW i & II, UN, etc. Where parties (teams) are defined and/or one player can have more countries assigned.

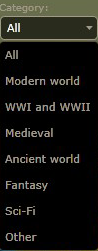
You can filter the maps/scenarios/presents you want to have a look at by utilizing the map-filter.

Insert a name of map/scenario/preset to search for it or use a creators name (player name) to look for specific maps created by this player. If you don't find it, make sure you are typing the correct name and that you are looking in the right category: map, scenario or preset. If you still don't find it, it is because the map/scenario/preset hasn't been published.
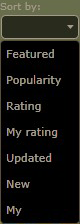
You can also filter the maps by using the following filter options:
You can also filter the maps by using the following filter options:
|
|
|
|

|
Finally, when you click on a map, the following window will open.
You can preview the map or start a game on it. If the creator of the map allowed it, you can also make a clone of it or base a new scenario/preset on it. |

II. Map Editor
|
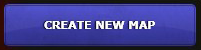
To start the map editor click "Create New Map". |
|
Once you decide to create a map, the following window opens with some options and choices to be made.

|
|
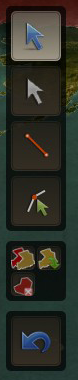
When you get into the map editor there are two tool bars: the side bar (left hand) with the border, country and city editing tools; and the main menu (top right). There is also a Navigator on the bottom right corner.
|

[Top] Main menu: Countries, Cities, Units, Map options, ave, Mute, Exit and Full screen
[Left] Editing tools (side bar): Select country/city, Edit borders, Draw borders, Add/remove/move points, Copy/Paste/Delete and Undo
|
Lets go through the Main menu options.
First the Map options (the little map and wheel icon). It is here where you define the settings of the map.
First the Map options (the little map and wheel icon). It is here where you define the settings of the map.
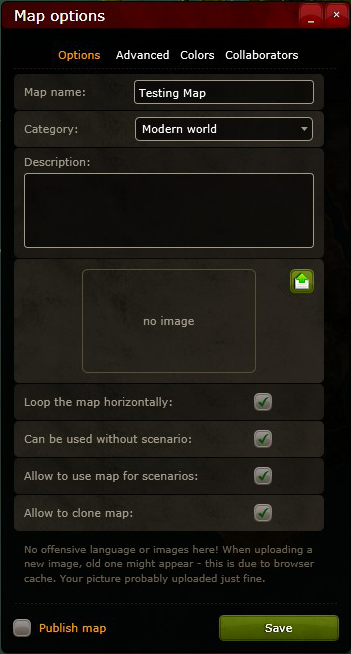
In Options you can define:
|
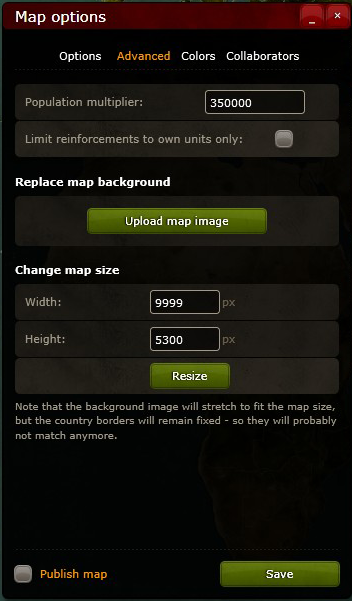
In Advanced you can define:
|
Limit reinforcements to own units only: This option allows to simulate an assignation of particular units to specific players starting in a determined country. How does it work?
Example: I limited the building of Marines to France (in the units editor, more information below) and the building of Destroyers to Germany; so France can build Marines but no Destroyers and Germany can build Destroyers but no Marines. If France takes Germany, it will be able to produce Marines in Berlin but no Destroyers in Hamburg. On the other hand, Germany, if it takes France, will be able to build Destroyers in any French port city but no Marines.
If this option is unchecked and units are limited to particular countries (in unit editor), then any player holding this particular country will be able to produce the units limited to it. If this option is checked, you are basically saying "the units allowed to be produced in a players' home-country can be built in whatever territory this player is holding" (assigning units to a particular player).
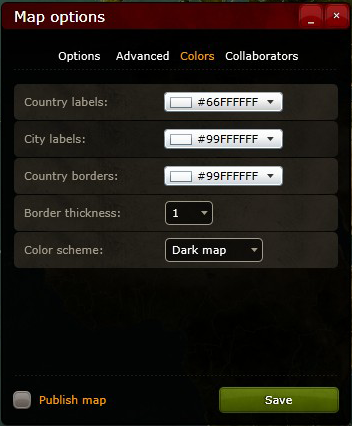
In Colors you can pick:
|
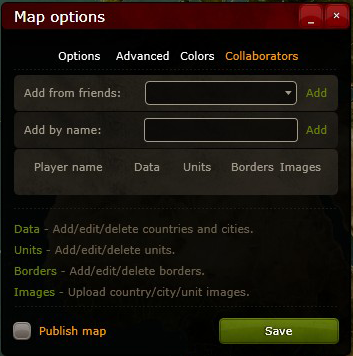
Collaborators:
Here you can add other players and make a collaborative project. You can pick from your friends list or just by adding the name of the player. Furthermore, you can define the role of this collaborator. |
Important: Clicking the Save option in these menus is "just" to save the changes you've made. After that, you have to click on the small Diskette in the main menu to save all changes!
Finally, as long as you don't check the "Publish map" option, no other player will be able to see or utilize your map.
Finally, as long as you don't check the "Publish map" option, no other player will be able to see or utilize your map.
A second set of tools are related to Countries and Cities. You can access them through the main menu: the green flag for countries and the star for cities. Or you can simply click on a city to open its specific setting window or with the country the same.

There are two country windows. The first is a complete list of the countries that have been created on the map and you can order the countries by Name, number of cities, population, etc.
The second country window is the one that you can use to change the following items:
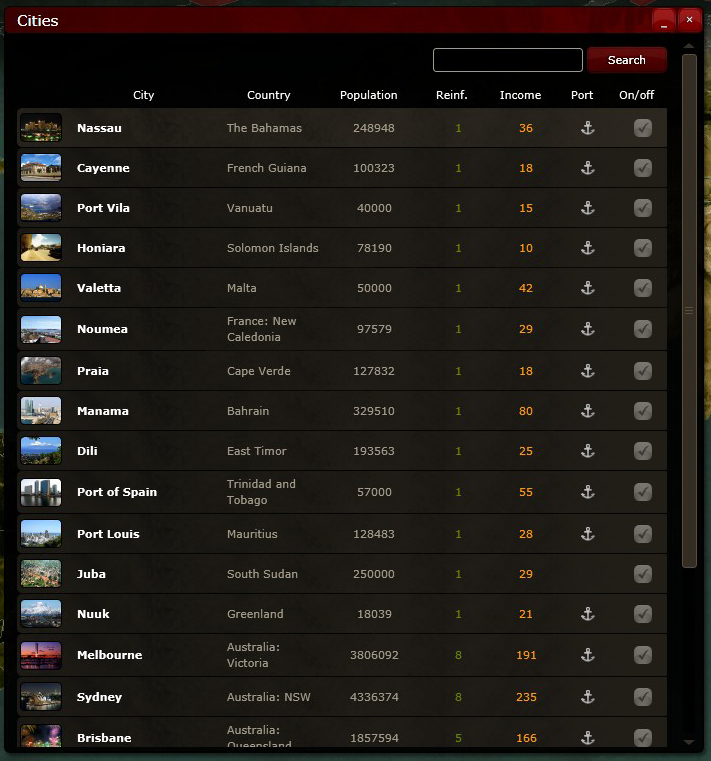
On the other hand, there is the city window, where you can edit the characteristics of a particular city. Such as:
Finally there is the second city window, which you can access by clicking on the little star in the main menu. It is similar to the country window, showing the list of cities that exist on your map. See below.
The second country window is the one that you can use to change the following items:
- Upload a Flag or Image (upload an image, will be resized to 40x27)
- Define the country name
- Define the country population
- Define the label font size
- Define the position the country label
- Add new cities to the country
On the other hand, there is the city window, where you can edit the characteristics of a particular city. Such as:
- City image (upload an image, will be resized to 40x27)
- Location (click set and then on map where you want to have the city)
- City name
- Income per turn (1-1000)
- Reinforcements (1-8)
- Population (keep automatic)
- Capital (whether the city is a capital or not; only 1 capital per country)
- Port (whether the city is a port or not; only makes sense if it is on a coastline)
- Extra (whether the city is a standard city or only appears if players choose "extra cities" when starting a game on this map)
Finally there is the second city window, which you can access by clicking on the little star in the main menu. It is similar to the country window, showing the list of cities that exist on your map. See below.
The last major editing tool from the main menu is the Units tab. If you are doing a map from scratch this window will be empty. My suggestion is to click on the "copy default units" tab and to copy them into the list and to start modifying them according to your needs. Just one small comment at this point, you have to keep at least a "Ground: Main defence" and a "Ground: Secondary defence" unit defined, so the map can work accordingly with the reinforcements rate defined in the cities.
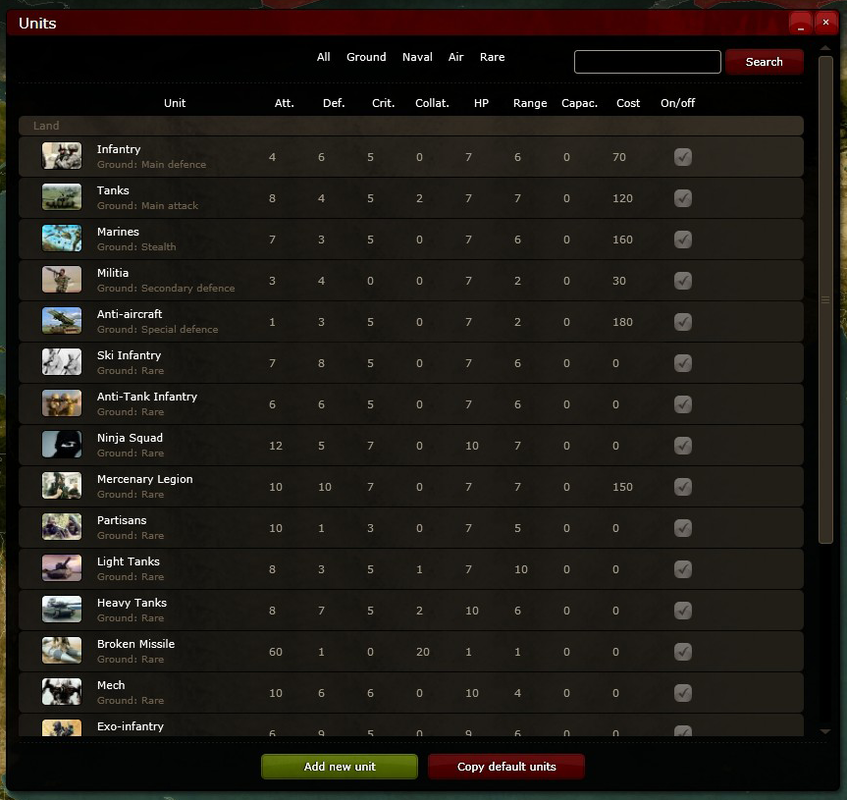
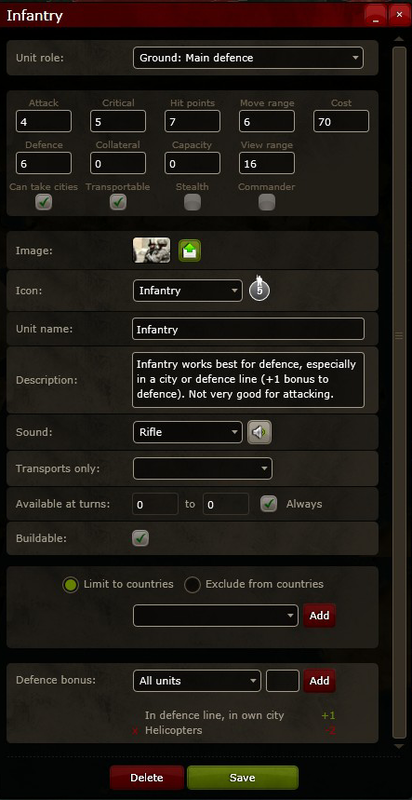
When you click on any of the Units, then the following window will open.
|
Here you can define:
|
|
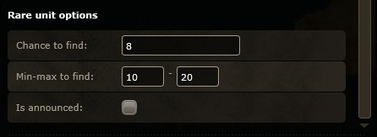
If you are editing a Rare unit - non-buildable and only appear in the game by "luck" because a player found them in a city that he took - then there are additional options that have to be established in the Rare unit options:
|
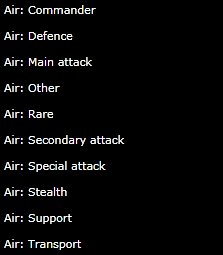
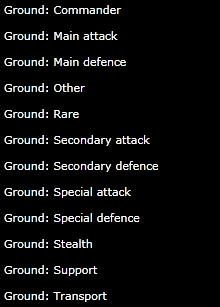
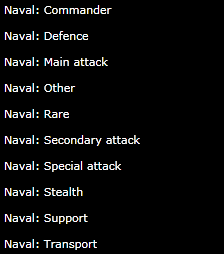
Unit role. The following unit roles are available:
|
|
|
Just try them out, but basically:
- Commander: Unit that gives special abilities to other aircraft (adding to attack bonus, etc.)
- Main attack: Unit focused on attack (Tank, Bomber, Destroyer, etc.)
- Main defence: Unit focused on defence
- Other: A blank unit that can be created into any other unit (starts from scratch)
- Rare: A rare unit that cannot be built, only dropped in scenario or found by taking a city
- Secondary attack: Just like the Main attack, but slightly weaker and cheaper
- Secondary defence: Another defence unit (weaker but cheaper than main defence)
- Special attack: Other attack units (can eventually carry other units)
- Special defence: Other defence unit
- Stealth: An "invisible" unit (usually for attack and invisible to opponent)
- Support: A support unit, like spying unit, etc.
- Transport: A unit that is capable of transporting other units (can only transport land units)
Unit characteristics. Coming soon!
