Turkey expansion 1: Basic Imperialist
Strategy: Imperialist
Required upgrades: Imperialist, Naval Transport Capacity, Faster General I&II and Faster Ground Main Defence
Difficulty: 3/5 (straight forward movements)
Required upgrades: Imperialist, Naval Transport Capacity, Faster General I&II and Faster Ground Main Defence
Difficulty: 3/5 (straight forward movements)
Units:
Movements:
- Diyarbakir: 2 Infantry
- Adana: 4 Infantry
- Antalya: 1 Transport + 2 Infantry
- Izmir: 1 Transport + 7 Infantry
- Bursa: 5 Infantry
- Istanbul: 1 Transport + 7 Infantry
- Ankara: 8 Infantry
- Samsun: 1 Infantry
Movements:
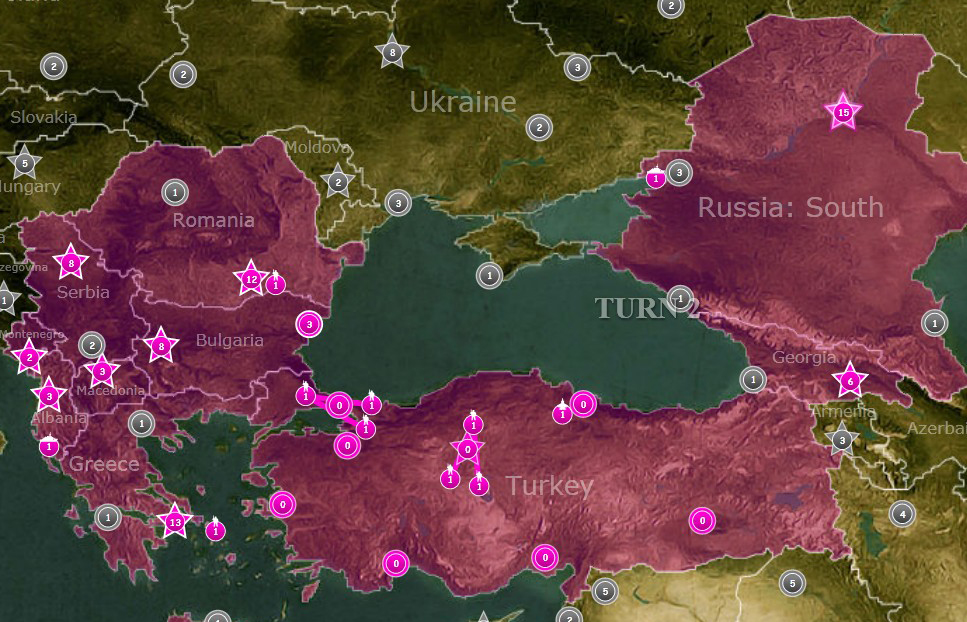
- Diyarbakir: 4 Infantry take Yerevan (Armenia)
- Adana: 8 Infantry to Antalya
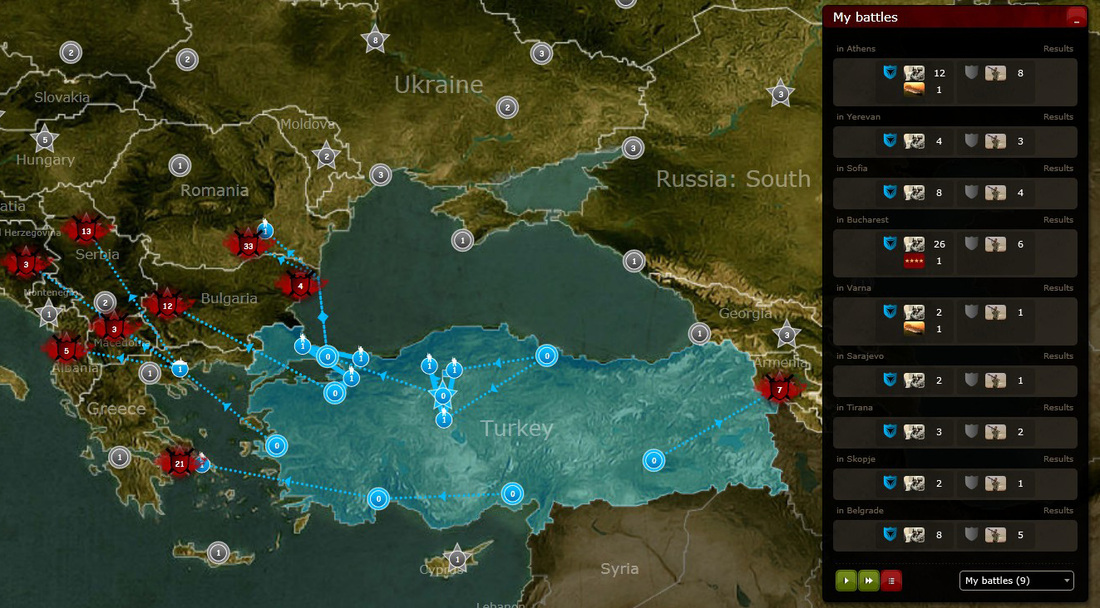
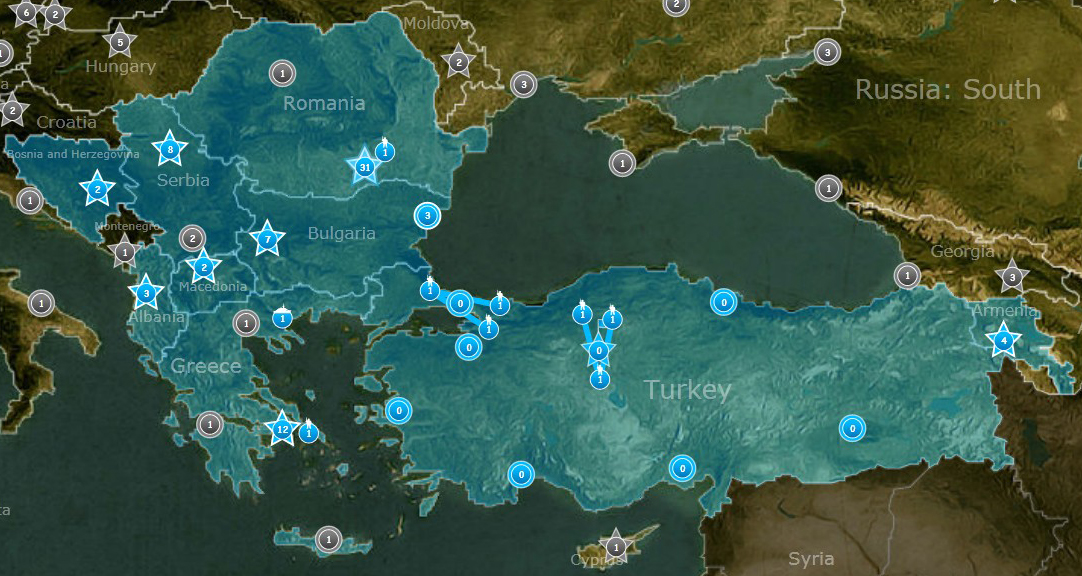
- Antalya: 13 Infantry on Transport take Athens (Greece); optional to drop 1 Infantry outside Athens (for future walling)
- Izmir: 15 Infantry on Transport northern coast of Greece
- Northern Coast of Greece: 2 Infantry take Sarajevo (Bosnia and Herzegovina), 3 Infantry take Tirana (Albania), 2 Infantry take Skopje (Macedonia) and 8 Infantry take Belgrade (Serbia)
- Bursa: 8 Infantry take Sofia (Bulgaria)
- Ankara: 14 Infantry and General to Istanbul
- Wall Ankara using 1 Infantry from city and 2 Infantry from Samsun
- Istanbul: 29 Infantry and General on Transport (2 trips) to north of Varna (Bulgaria); move 26 and General take Bucharest (Romania), 1 Infantry outside Bucharest (to prevent walling) and 2 Infantry and Transport take Varna
- Wall Istanbul with 1 Infantry from city and 2 Infantry from Bursa
Turkey expansion 2: Advanced Imperialist
Strategy: Imperialist
Required upgrades: Imperialist, Naval Transport Capacity, Faster General I&II, Air Transport Capacity, Faster Ground Main Defence and General: Movement Range
Difficulty: 5/5 (managing a lot of precise movements in 4 minutes)
Required upgrades: Imperialist, Naval Transport Capacity, Faster General I&II, Air Transport Capacity, Faster Ground Main Defence and General: Movement Range
Difficulty: 5/5 (managing a lot of precise movements in 4 minutes)
Units:
Movements:
- Diyarbakir: 2 Tanks
- Adana: 4 Infantry
- Antalya: 1 Transport + 2 Infantry
- Izmir: 1 Transport + 7 Infantry
- Bursa: 5 Infantry
- Istanbul: 1 Transport + 7 Infantry
- Ankara: 1 Air Transport + 7 Infantry
- Samsun: 1 Transport
Movements:
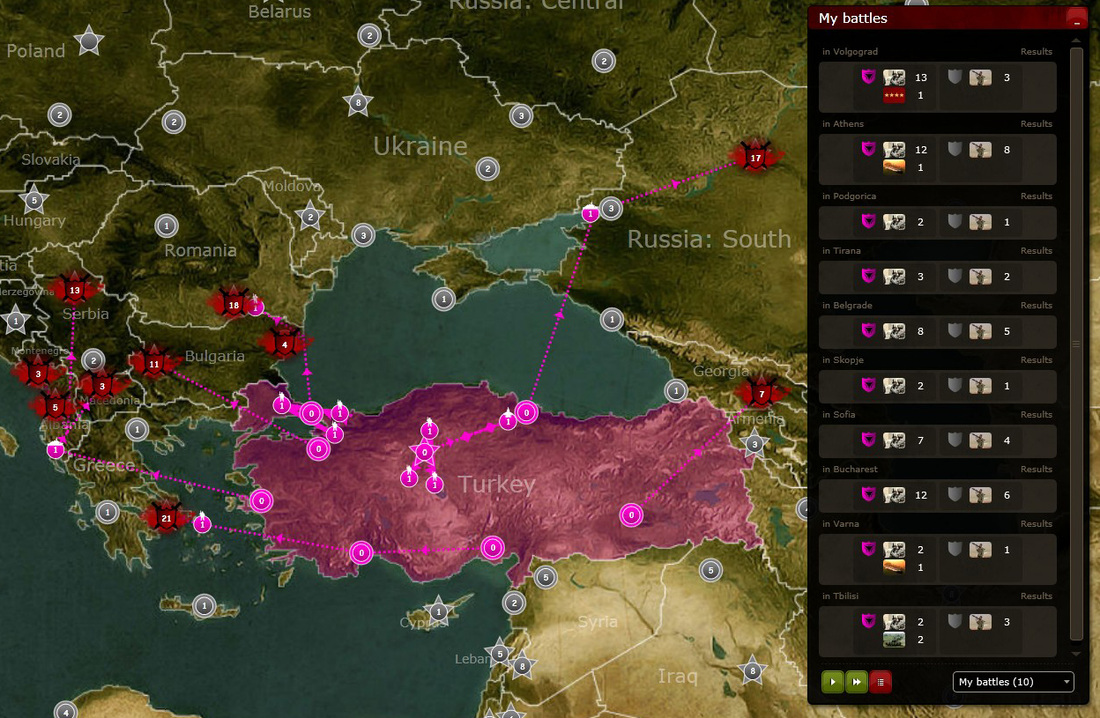
- Diyarbakir: 2 Infantry + 2 Tanks take Tbilisi (Georgia)
- Adana: 8 Infantry to Antalya
- Antalya: 13 Infantry on Transport take Athens (Greece); optional to drop 1 Infantry outside Athens (for future walling)
- Izmir: 15 Infantry on Transport to southern coast of Albania
- Southern coast of Albania: 2 Infantry take Podgorica (Montenegro), 3 Infantry take Tirana (Albania), 2 Infantry take Skopje (Macedonia) and 8 Infantry take Belgrade (Serbia)
- Bursa: 7 Infantry take Sofia (Bulgaria) and 3 Infantry to wall Istanbul
- Istanbul: 15 Infantry on Transport to north of Varna (Bulgaria); move 12 take Bucharest (Romania), 1 Infantry outside Bucharest (to prevent walling) and 2 Infantry and Transport take Varna
- Ankara: move 5 Infantry with Air Transport close to Samsun, move Air Transport back to Ankara, move another 5 Infantry (on Air Transport) to stack outside Samsun, move Air Transport back half way to Ankara, move 2 Infantry + General to Air Transport and move them on stack outside Samsun; finally move stack (12 Infantry and General) to Samsun
- Samsun: move 13 Infantry and General on Transport close to Rostov-na-Donu
- Rostov-na-Donu: move stack to take Volgograd
- Bursa: use 3 Infantry to wall Istanbul
- Ankara: use 3 Infantry to wall city